Oscillator circuits are the ones which produces certain waveform with specified frequency. These kind of circuits come in handy when there is a need of signal source for any specified application. Here i have built a primitive Wien bridge oscillator using Opamp which is minimal in size and makes a perfect signal source for your circuits.
WIEN BRIDGE OSCILLATOR CIRCUIT:
WORKING OF CIRCUIT:
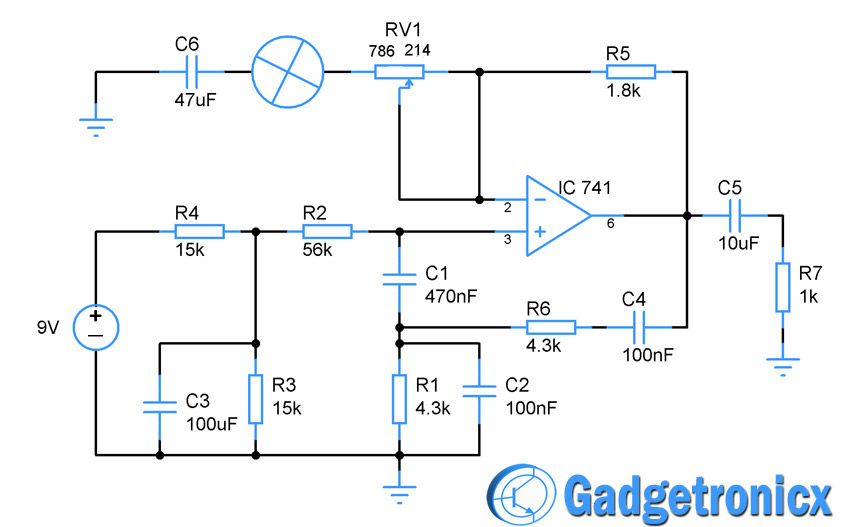
This is a Wien bridge Oscillator. Basically it is just an amplifier with one positive feedback (the series and parallel RC network) and one negative feedback (the 1.8k resistor, the potentiometer and the incandescent bulb). The idea behind it is that the series/parallel RC network has an exact signal attenuation of 3 times (-6dB). That’s because both networks resonate at the same frequency but one is a low pass filter and the other a high pass filter. Each filter has a -3dB at the center frequency. When combined the attenuation becomes -6dB.
In order to make it work the amplifier must have an exact gain of 3 (6dB). At anything below 3 oscillations will not start, and at anything above 3 the oscillations will rise into cut off distortion. No matter how hard you try you will never be able to set the gain at exactly 3, due to thermal drift of semiconductors and variation of the supply rails and such. What Hewlett Packard realized is that you can use a light bulb to stabilize the amplitude. That’s because an incandescent light bulb has a Positive Thermal Coefficient (PTC). That means that when idle it has low resistance and when current starts passing through it its resistance increases.
Let’s trace back the processes in the Oscillator. With the potentiometer you set the gain to be slightly above 3. The oscillations start rising, that would normally lead to cut off, and more current starts flowing through the bulb. As the current increases, so does the bulb’s resistance. That leads to a strengthened negative feedback, that decrease the gain below 3. So the output starts fading away. As it decreases less current flows through the bulb, and it’s resistance starts falling too. That leads to a weakened negative feedback and subsequently a higher gain than 3. So the output starts rising. This cycle continues until an equilibrium state is reached and the output is stabilized.
The few advantages this method has, is that due to the much lower time constant (Tau) of the light bulb, than the oscillations, the distortion it induces is much lower than any other type of stabilization. That’s because other types try to enforce the correction in every cycle of the wave, introducing distortion in each one of them. This method enforces correction at a much lower time constant (a few Hz), because the filament needs time to heat up and cool down again. Another apparent advantage is stability over a wide range of supply voltages.
One of the disadvantages is that if you want a wide variety of frequencies, you need to take some precautions in the circuitry, otherwise you need to readjust the negative feedback for lowest distortion.
OUTPUT WAVE:
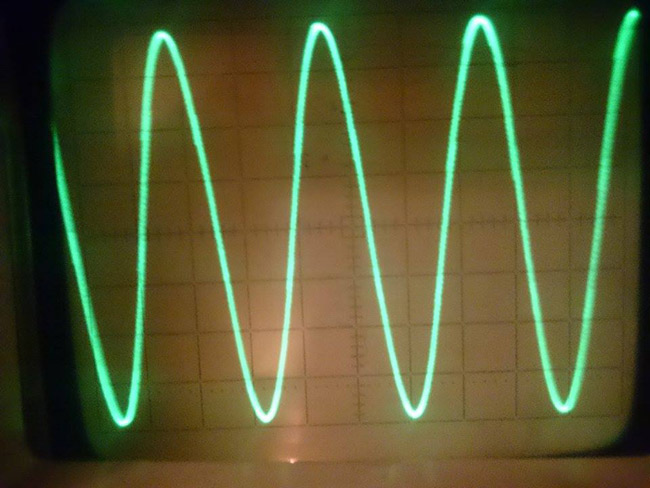
NOTE:
- The Opamp used is IC 741.
- You can use the small lamps you find in a Christmas tree or any other decoration lights

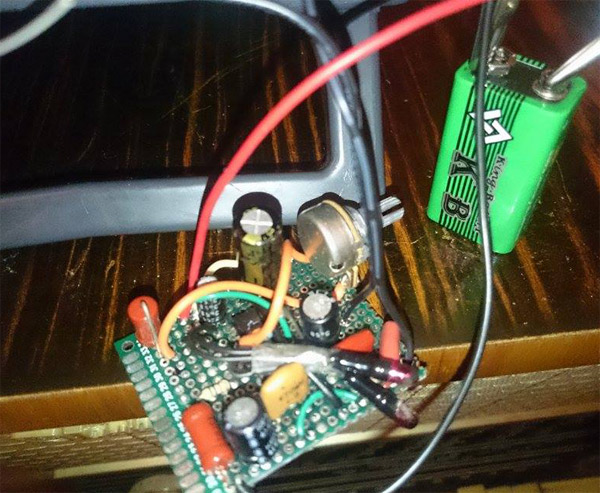

I have another question. Can you explain the power supply hook-up to the 741 op amp? Pin 4 of the 741 is for V-. Pin 7 of the 741 is for V+. You show a connection to ground. Is that ground in the middle of two batteries powering the 741?
Hi, there! Thanks for the great explanation of the Wien Bridge oscillator. Also, thanks for calling it a WIEN bridge oscillator, not a WEIN bridge oscillator!
Question: Is the variable resistor (potentiometer) a 1,000 ohm (1k) pot?
– Brock
Yeah it’s a 1k pot, preferably linear, because it’s hard to tweak to get the stable amplitude, and the circuit is not a split rail, it uses a single rail power supply. The – of the battery is actually the ground