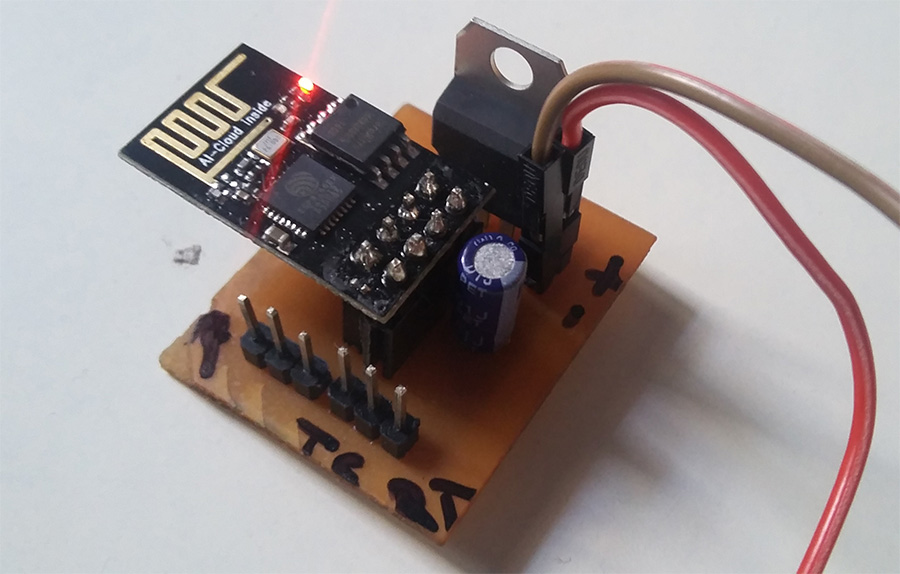
ESP8266-01 have gained a great popularity among enthusiasts and hobbyists because of its small size and easy to use functionality. But still being a 3.3v power supply and not able to use it in General purpose bread board can be little annoying when you are testing and prototyping with it. To overcome this I thought to design and build a homemade plug and play board which will make this ESP8266-01 module easy to work with .
WHAT THIS PLUG AND PLAY BOARD OFFERS:
- This plug and play board provides an easy plug and play option for our ESP8266
- Gives a neat setup while prototyping eliminating majority of ugly wires hanging around.
- Eliminates the need of external regulator to obtain 3.3V supply for the module.
- Basically allows you to work with this module easily.
CIRCUIT DESIGN:
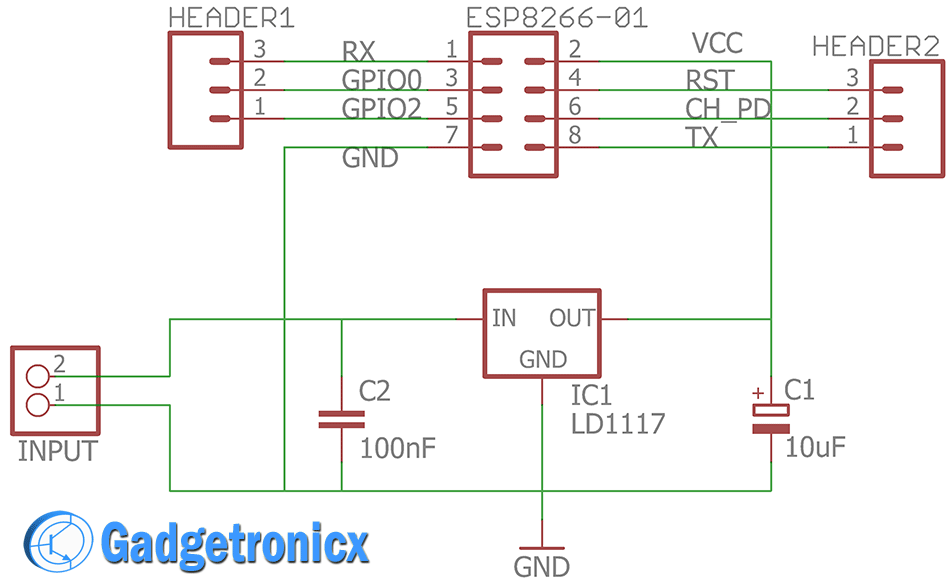
In the above design I have used a 2×4 female header (0.1″ spacing) in which the ESP8266-01 module will be plugged in. The LD1117 serves the purpose of giving 3.3V as output. If you look at the data sheet of LD1117 you will find the typical circuit for fixed output voltages. IC1, C1 and C2 forms the typical power supply circuit for this board.
Two 3-pin male headers Header1 and Header2 were used to establish connection between for the ESP8266-01 pins. And finally a 2-pin male header to connect the input power supply to the board, it’s that simple :).
PCB DESIGN:
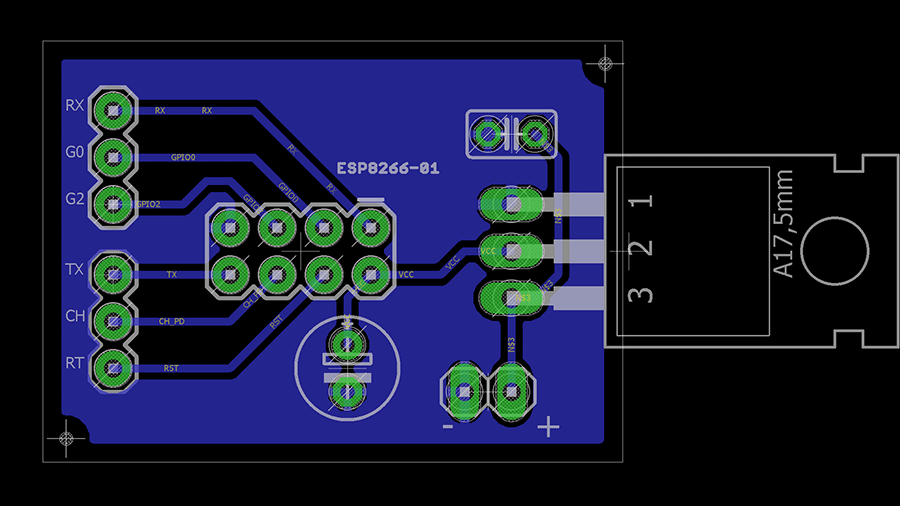
The above shown is the PCB design of this plug and play board, I intend to keep this small as possible. This board only measures 1.25” x 0.9”, so it’s pretty small and easily portable. You can download the eagle design files below. I have used Eagle to design this board, however there are many online PCB design platforms you can use to design such boards. Out of these platforms I prefer using EasyEda since it is fast and easy to use.
HOMEBUILT BOARD:
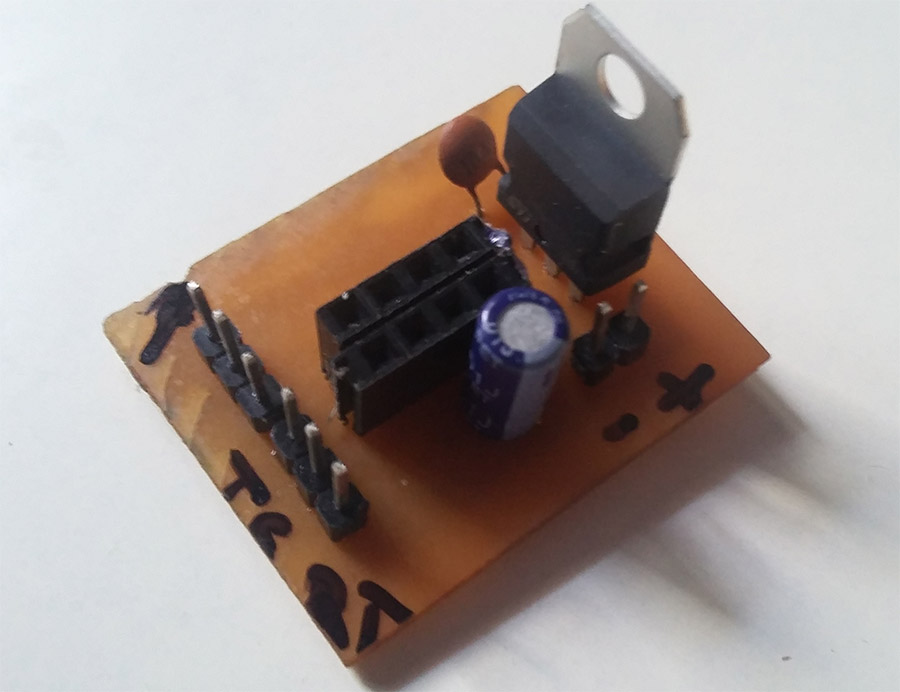
I have made this board in home by following this great article on “Making PCB’s at home”. You can try making this board at home or contact any manufacturer on making this one using our design. The board was bit rusty on looks, being my first attempt on making PCB’s at home but functionality turns out fine 🙂
WHAT’S NOT IN THIS PLUG AND PLAY BOARD:
This board is only compatible to use with 3.3v logic devices, you need to use a logic shifter when you intend to work with TTL logic levels such as arduino and other development platforms. Also I didn’t add any way to draw 3.3v from this board which will be lot cooler feature to have.
V2 VERSION:
I was working on V2 version of this board where I intend to add logic shifter with this board. Adding this will make the ESP8266 easy to play around with both 3.3v and TTL logic devices. Also i am looking to add a way to draw 3.3v power supply from the board as well. See you soon with version 2 of this board.

