 |
| Two 7 segment interface in single port of microcontroller |
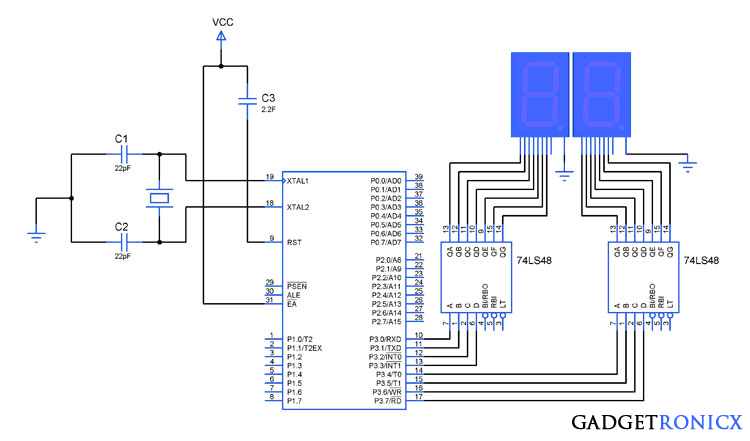
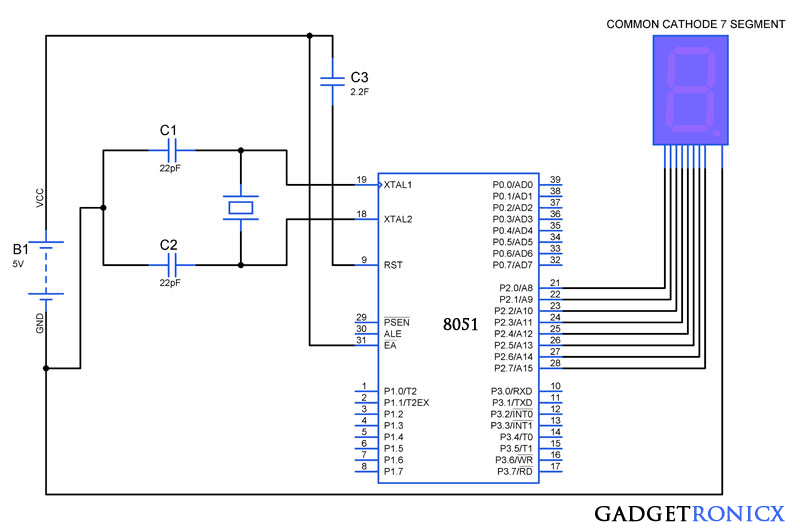
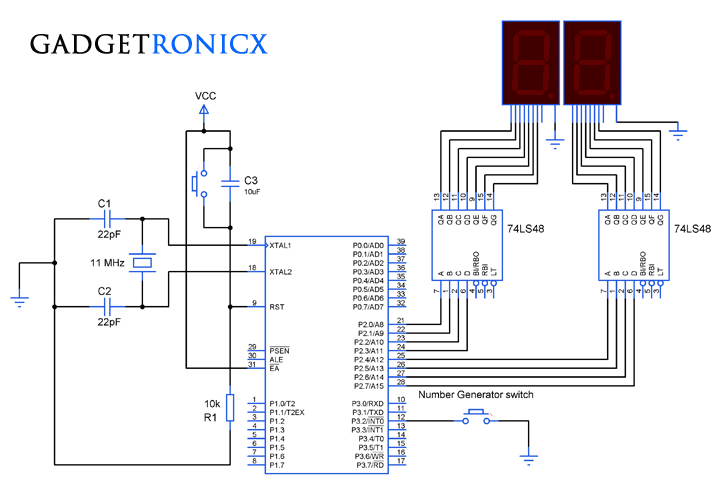
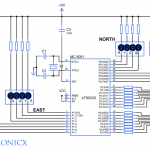
7 Segments are widely employed displays widely used in embedded applications. It possess many advantages due to its small size, low power consumption and low cost. Before getting started with it read How to interface 7 segment with 8051. But dedicating 7 pins of the microcontroller to it creates a major drawback for it and also the handling capacity of the controller is greatly reduced that is you can only use only four segments along with 8051. In order to avoid that this tutorial teaches the method used in interfacing two 7 segments in a single port of a 8051 microcontroller.
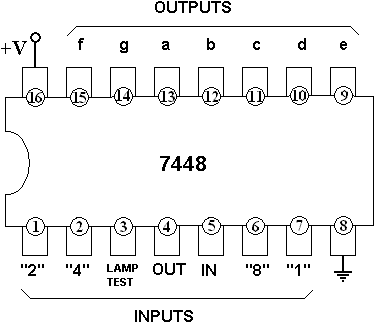
To overcome this you can use the below design where it uses a specific decoder IC 7448 which decodes Binary coded decimal input to proper pattern output to light about the specific LED’s in the 7 segment. Adding this decoder IC along with the 7 segment would allow you to interface a total of 8 seven segments with your 8051 Microcontroller.
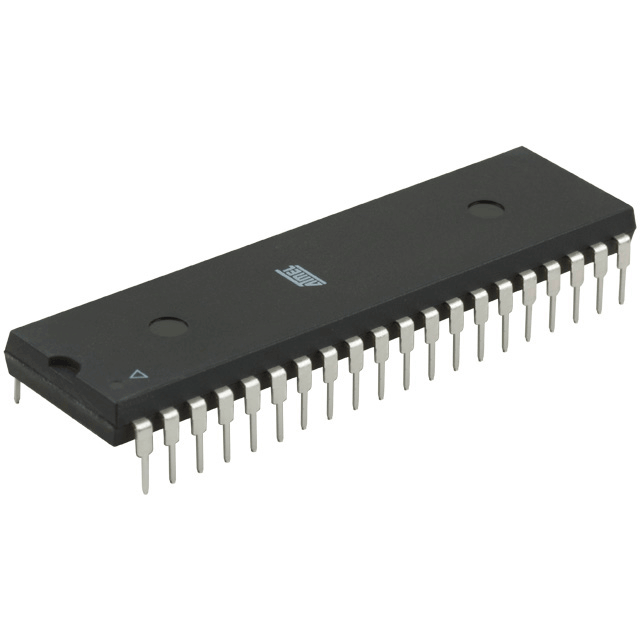
PIN DIAGRAM OF 74LS48:
 |
| IC 7448 |
STEPS TO PROGRAM TWO 7 SEGMENTS IN SINGLE PORT OF 8051 USING DECODER:
- The main advantage of using decoder is there is no need for the user to determine the pattern of illumination of 7 segment.
- You can feed the values directly using your lower four and higher four bits of your microcontroller port.
- Make it to increment one by one by putting it in a for loop.
- You need to shift the increment values from lower four bits to higher four bits for continuous display of numbers in 7 segment.
CODE:
#include<regx51.h>
int a,b;
void delay();
void main()
  {
    for(a=0;a<=9;a++)   //Loop for displaying counts in 7 Segment
    {
      for(b=0;b<=9;b++)
      {
        P3=a|b<<4;   //Shift values from lower four bits to higher four bits
        delay();         //Calling out delay
      }
    }
  }
void delay()         //software delay
 {
    int i,j;
    for(i=0;i<=100;i++)
     {
       for(j=0;j<=300;j++);
     }
  }

can you help me to decode the first for loop?
when a=1 or 00000001, then when b=0 or 00000000,a|b will return 00000001 and a|b<<4 will give 00010000, so the 7 segment connected with upper 4 bits should display 1 but instead it shows 0. Can you tell me how really it works? Thanks
Nevermind i understood. It idfirst shifting and then or’ing
thanks for your help its working
Glad to hear that , keep visiting.
thanks,
please send me design and hex file on email id ‘sumedhaaggarwal@yahoo.co.in’
Sumedha,
I have sent the design and hex files to your mail. Kindly check your inbox and browse our site for more interesting tutorials and circuits, keep visiting.
plz give me design and hex life
email “mahmud4hp@gmail.com”
i want to run this counter in reverse direction ie from 99 to 00. can u give me coding
Hello Sumi,
All you have to do is change the conditions in both the “for loops”, You need to alter the code in line 6 and 8. Rest remains the same.
for(a=9;a>=0;a–) and for(b=9;b>=0;b–)
That’s it. Hope it helps
but its not working u can try your self in
protius
Sumedha,
I have checked the code and its working fine in proteus. Sometimes proteus won’t give desired output so try creating a new file and try out the design again or implement it in hardware if you have the programmer then it will be 100% working. Kindly post in your email id I may send you the design and hex file, you can check it by yourself. Hope it helps.