DIY robot car ,a thing that fascinates many electronics hobbyists and enthusiasts. In fact i have been longing to get this thing done badly and finally did it today. This robotic car was constructed using 8051 Microcontroller, DC motor, L293D and switches for the robot controller. The highlighting feature about this car is its simplicity and the low cost. This article is intend to guide you to build your own DIY robot car by your own.
PROJECT DESIGN OF DIY ROBOT CAR:
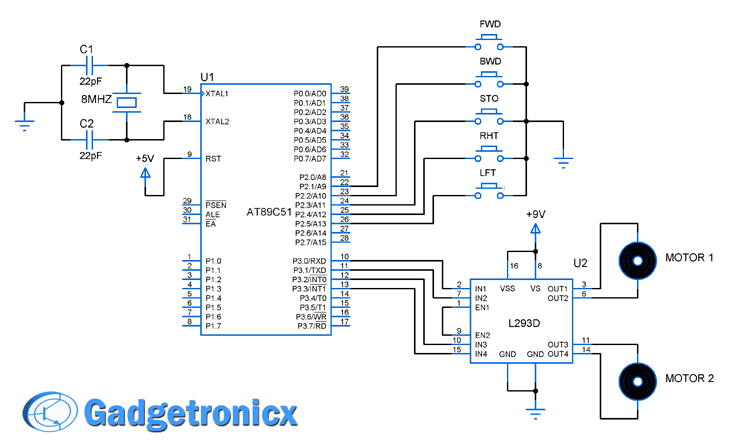
The whole system is built 8051 family microcontroller Atmel AT89S52 which is a low cost chip. Separate switches are interfaced to the Port 2 of the controller which together forms the remote controller for our RC car. DC motors are used in this project to provide movement to our robot car. The 8051 cannot provide sufficient current to drive the motors here, hence we use a driver chip L293D to drive the motor.
L293D DUAL H-BRIDGE MOTOR CONTROLLER:
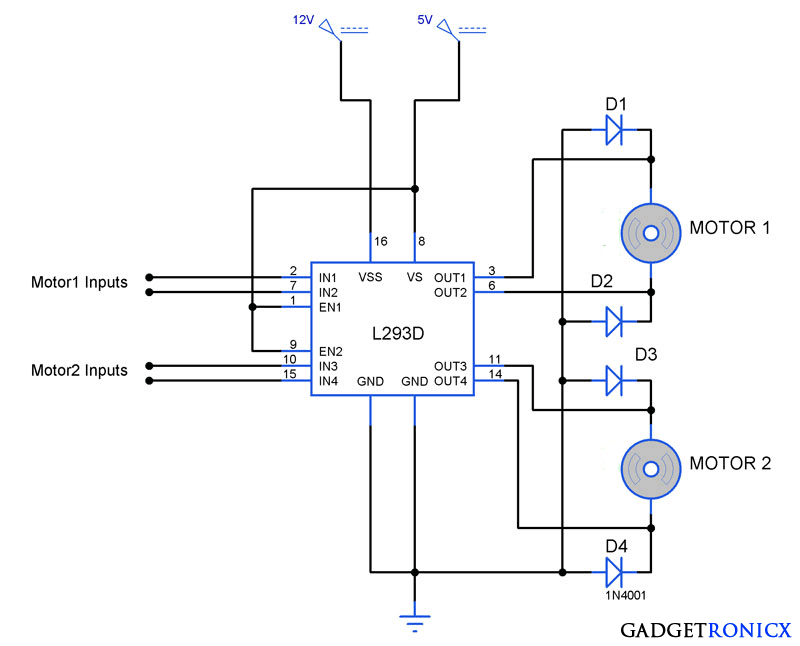
You can ignore the diodes in the above circuit
L293D is a dual H-Bridge motor driver, So with one IC we can interface two DC motors which can be controlled in both clockwise and counter clockwise direction . It means that you can control two DC motor with a single L293D IC. The l293d can drive small and quiet big motors as well.
It works on the concept of H-bridge. H-bridge is a circuit which allows the voltage to be flown in either direction. As you know voltage need to change its direction for being able to rotate the motor in clockwise or anticlockwise direction, Hence H-bridge IC are ideal for driving a DC motor.
There are two Enable pins on l293d. Pin 1 and pin 9, for being able to drive the motor, the pin 1 and 9 need to be high. For driving the motor with left H-bridge you need to enable pin 1 to high. And for right H-Bridge you need to make the pin 9 to high. If anyone of the either pin1 or pin9 goes low then the motor in the corresponding section will suspend working. It’s like a switch.
There are 4 input pins for this l293d, pin 2, 7 on the left and pin 15 ,10 on the right. Left input pins will regulate the rotation of motor connected across left side and right input for motor on the right hand side. The motors are rotated on the basis of the inputs provided across the input pins as LOGIC 0 or LOGIC 1. In simple you need to provide Logic 0 or 1 across the input pins for rotating the motor.
Let’s consider a Motor connected to output pins (pin 3, 6). For rotating the motor in clockwise direction the input pins has to be provided with Logic 1 and Logic 0.
- Pin2 = Logic1 and Pin7 = Logic0 |ClockwiseDirection
- Pin2 = Logic0 and Pin7 = Logic1 |Anticlockwisedirection
- Pin2 = Logic0 and Pin7 = Logic0 |Idle[Norotation][Hi-Impedancestate]
In a very similar way the motor can also operated across input pin 15,10 for motor connected to 11 and 14.
- Pin10 = Logic1 and Pin15= Logic0 |ClockwiseDirection
- Pin10 = Logic0 and Pin15= Logic1 |Anticlockwisedirection
- Pin10 = Logic0 and Pin15 = Logic0 |Idle[Norotation][Hi-Impedancestate]
VCC is the voltage that it needs for its own internal operation 9V, l293D will not use this voltage for driving the motor. For driving the motor it has a separate provision to provide motor supply VSS. L293d will use this to drive the motor. It means if you want to operate a motor at 9V then you need to provide a Supply of 9V across VSS Motor supply.
The maximum voltage for VSS motor supply is 36V. It can supply a max current of 600mA per channel. Since it can drive motors Up to 36v hence you can drive pretty big motors with this l293d. VCC pin 16 is the voltage (in this case 9V) for its own internal Operation. The maximum voltage ranges from 5v and up-to 36v.
REQUIREMENTS:
- AT89S52 (8051 chip by ATMLE Corp.)
- L293D (16 pin motor driver)
- DC motor (here I have used a geared one)
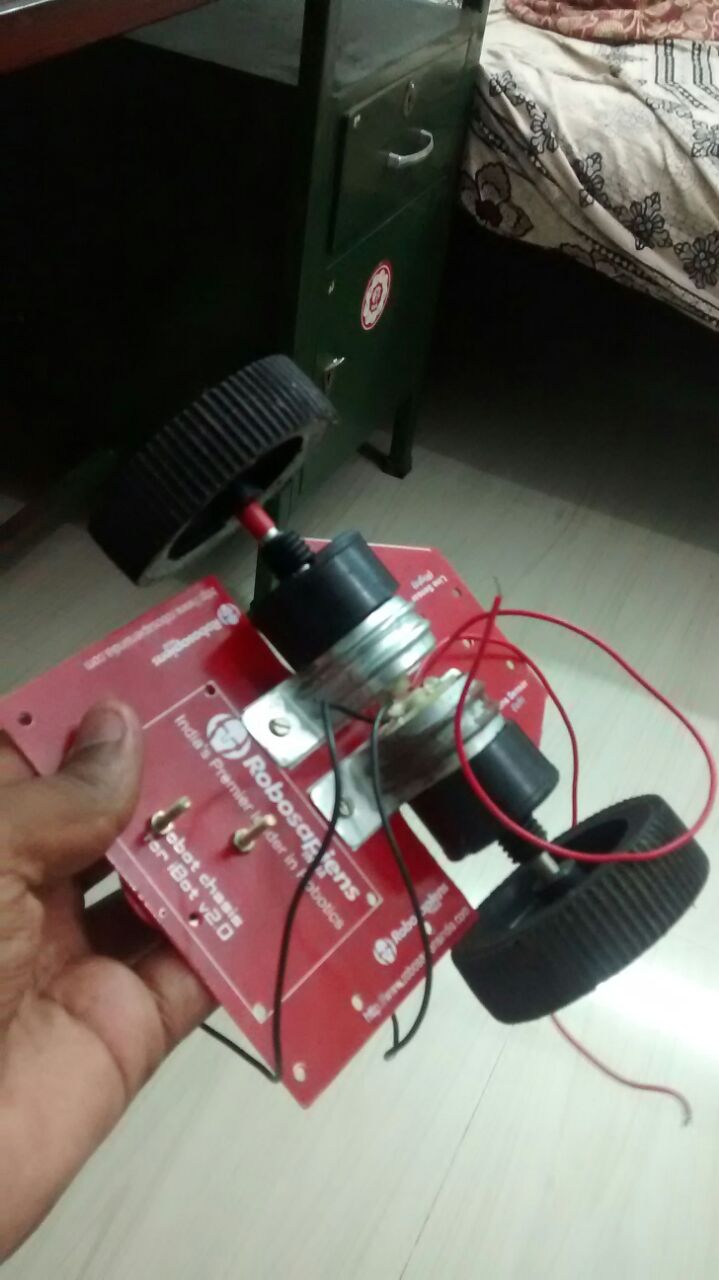
- Robot chasis
- Robot wheels
- Two 9V batteries
- Wires (connect joystick and controller)
- Switches (For building remote)
REMOTE SECTION:
It is made up of five switches to do the following functions.
- Move forward.
- Move backward.
- Stop.
- Turn left.
- Turn right
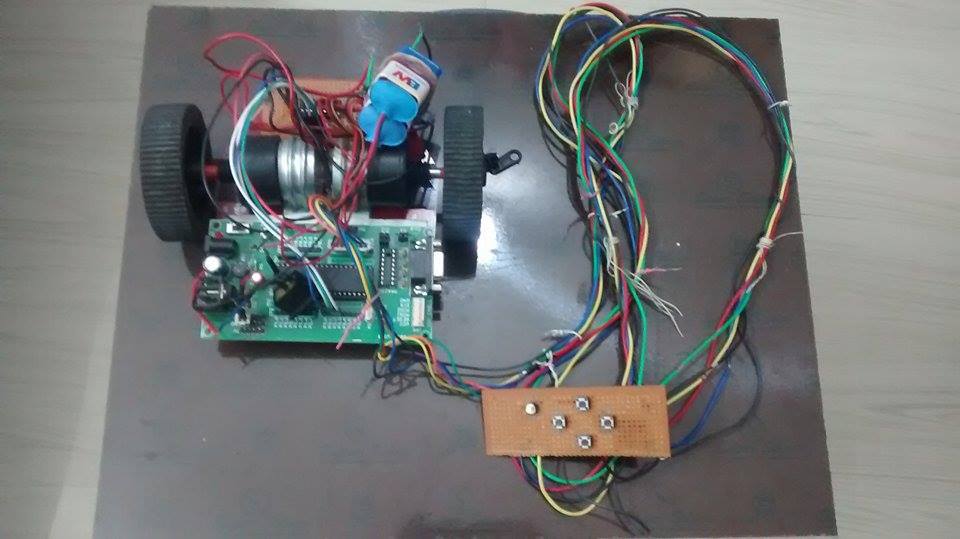
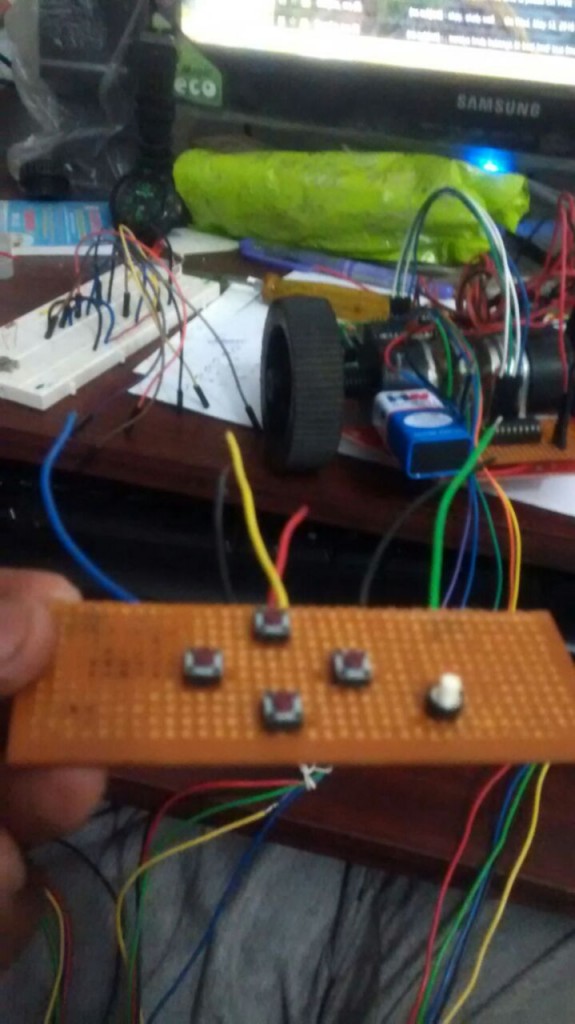
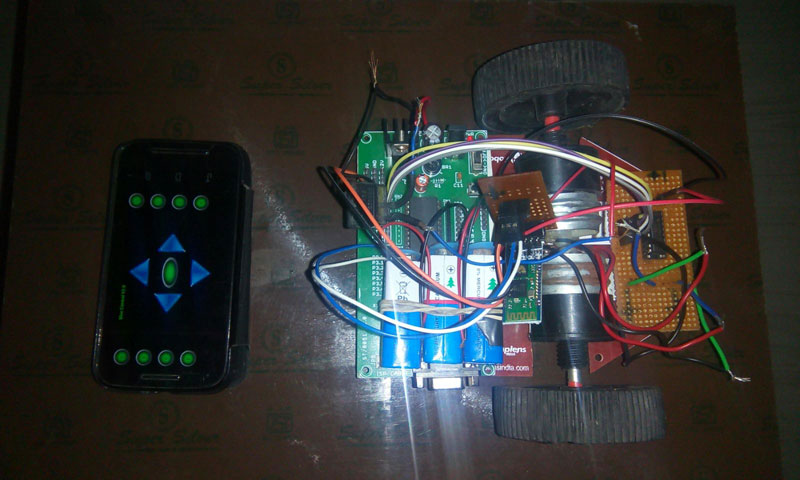
PICTURES OF DIY ROBOT CAR:
CODE :
#include<reg52.h>
sbit S1=P2^1;// connect switch 1 to Port2.0 for forward
sbit S2=P2^2; //used for backward
sbit S3=P2^3; // used for STOP
sbit S4=P2^4; // used for right turn
sbit S5=P2^5; // used for left turn
sbit motor_pin_1 = P3^0;
sbit motor_pin_2 = P3^1;
sbit motor_pin_3 = P3^2;
sbit motor_pin_4 = P3^3;
void delay(unsigned int);
void main ()
{
S1=1;//set switch as high
S2=1;
S3=1;
S4=1;
S5=1;
P3=0x00; //set Port 3 to low
while(1) //infinte loop
{
if(S1==0) //check swith is low(if anybody press switch 1?)
{
delay(10);
//P3=0x05;
motor_pin_1 = 0;
motor_pin_2 = 1;
motor_pin_3 = 0;
motor_pin_4 = 1;
}
else if(S2==0)
{
delay(10);
//P3=0x0a;
motor_pin_1 = 1;
motor_pin_2 = 0;
motor_pin_3 = 1;
motor_pin_4 = 0;
}
else if (S3==0)
{
delay(5);
motor_pin_1 = 0;
motor_pin_2 = 0;
motor_pin_3 = 0;
motor_pin_4 = 0;
}
if (S4==0)
{
delay(5);
motor_pin_1 = 1;
motor_pin_2 = 0;
motor_pin_3 = 0;
motor_pin_4 = 0;
}
if (S5==0)
{
delay(5);
motor_pin_1 = 0;
motor_pin_2 = 0;
motor_pin_3 = 1;
motor_pin_4 = 0;
}
}
}
void delay (unsigned int z) //delay function
{
unsigned i,j;
for(i=0;i<z;i++)
for(j=0;j<1275;j++);
}
The above articles shows wired control robot for beginners. I will soon publish article based on Wireless bluetooth controlled RC car.



Did you use Clock circuit on your project ?
did u use keil c-programming?
Yes
Hi,
can the 2 motors be rotated in opposite directions on right and left.if yes how?
Vedant,
You just have to modify the motor_pin values in the code like given below.
motor_pin_1 = 1;
motor_pin_2 = 0;
motor_pin_3 = 0;
motor_pin_4 = 1;
By the way why did you want to do that?
Can we use 89c51 instead of s51
Sikander,
Yes you can.
how to convert this project in to a wireless robot car?
hello Nagraj ! welcome to gadgetronicx. happy to see your comment. ok 1st i say its is wired robot car for learning beginners…after that we move to wireless,and you raised question”how to convert this project in to a wireless robot car?.” answer is easy, do u know some wireless device’s like Bluetooth, RF transceiver,zigbee , and also using DTMF.. i prefer you too interface bluetooth module, because its very simple, smartphone+ HC-05 bluetooth-its enough for to control wireless robot(forward, backward, right,left), u need not to develope smartphone apps, its avillable in your android Store.using this technology you can control robot using your smartphone…
would you able to write article on wireless robot car?
sure, i want to purchase HC-05 bluetooth module and then started my work.after i will write it
Nagraj click the below link. its a wireless robot car.
https://www.gadgetronicx.com/diy-android-controlled-robot-car/