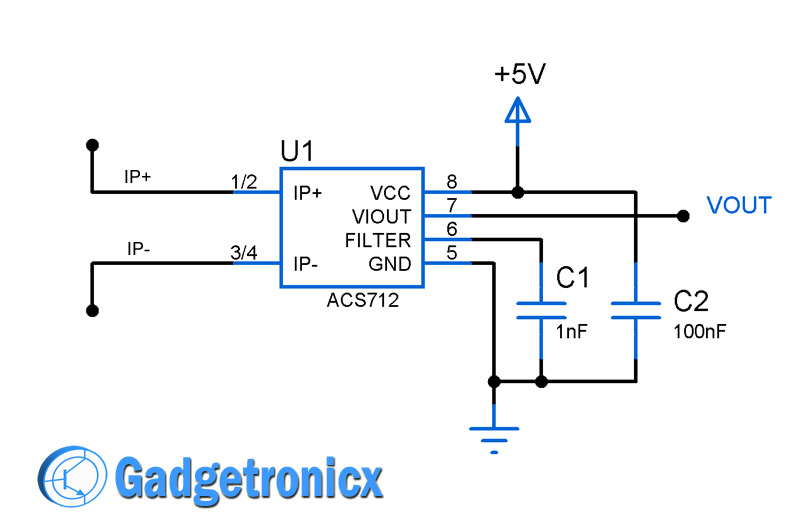
Current sensors are used when there is a need to measure the amount of current consumed by a certain appliance or device. There are several methods to measure the current flow and we are about to use Hall effect in our Current sensor switch circuit. IC ACS712 a simple linear current sensor form the most significant part of this circuit.
IC ACS712:
The IC ACS712 is a low cost hall effect current sensor which is capable of measuring current up to 20 Amperes. This IC consist of a copper conduction path through which the current to be measured flows. The output voltage will be proportional to the input current flow. Also the output voltage of this IC will go through a change of 100mV/A.
WORKING OF CURRENT SENSOR CIRCUIT:
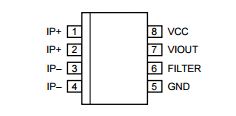
The Working is pretty straight forward, when current flows from the Pins 1,2 & 3,4 through the conduction path, it generates a magnetic field which is sensed by the hall effect sensor. This in turn converted into proportional output voltage. This equivalent output voltage will be obtained in the Pin 7 of the IC ACS712.
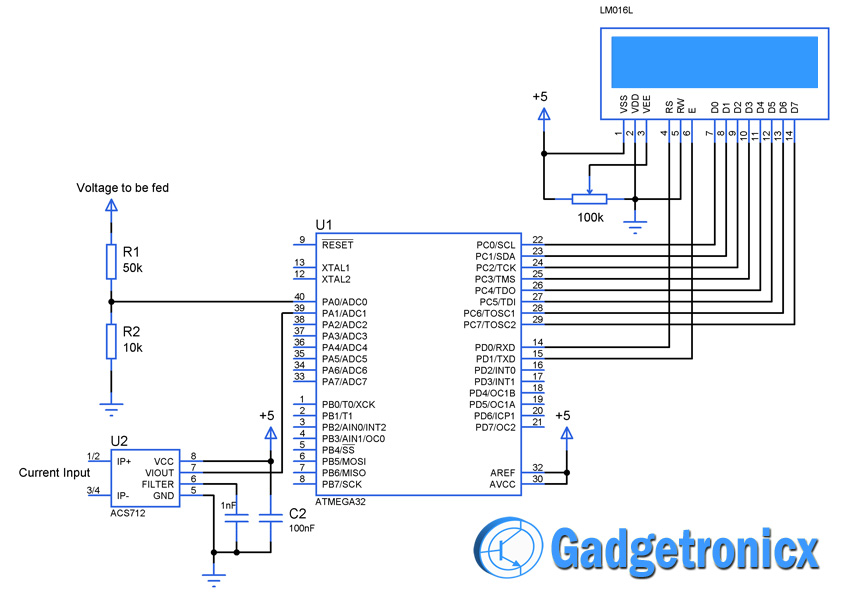
This type of Current sensor module will be useful for Microcontroller applications. The output from this circuit can be used with Analog pins of the Microcontroller and therefore precise value of current flow can be determined.
CURRENT SENSING SWITCH:
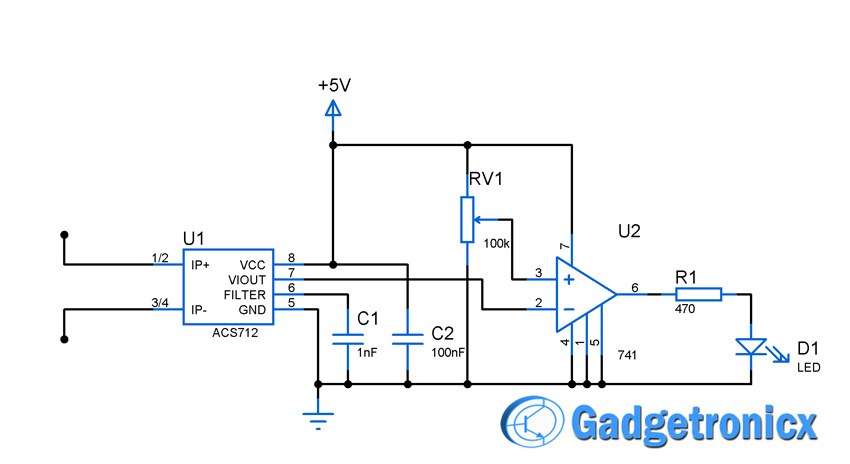
We can convert the current sensor circuit to a switch circuit by adding a simple stage of comparator along with it. The above circuit is a current switch toggles the output state whenever current exceeds a certain limit in their flow.
The reference value was set using variable resistor RV1 which feeds the non inverting input by preset level, whereas the output from the sensor IC was fed to inverting pin of the Op Amp. When the output voltage of IC is less than the preset value the output of Op amp remains high. The moment VIOUT exceeds the preset voltage Op amp toggles the output to low state. A LED was added as an indicator in the above circuit diagram you might also use relay provided sufficient power to drive it.
We can make it work the other way around that is make Op Amp gives logic 1 when current reaches preset value or logic 0 when it is below preset value. This can be done by simply swapping the inverting and non inverting pins of the Op Amp.
PARTS LIST:
- ACS712
- 100k POT
- 1nF Capacitor
- 100nF Capacitor
- 470 Ohm Resistor
- LM741
- Red LED

Please can I use this circuit to sense overload to shutdown sg3524 inverter during overload condition. If yes, how will I connect it to the shunt resistor to sense
IDIOT
You show on the circuit pin connections for 741 yet your parts list id 393
Trevor,
Made the update, thanks for pointing it out. But should have said in nicer way.
Good design..
But we have to know place this circuit. Use it to limit current of DC PSU.
If you use it as an MCB (in 220V AC line) , You have to minimalize first inrush current using “soft start circuit” or bypass this circuit for some seconds
That’s a good point Denis. Thank you for sharing.
What is the lowest sensing current to operate the circuit? I want to use this to sense/monitor low (1-10 milliAmps) in a Control circuit.
This circuit won’t fit for your purpose, despite the input current range within your requirement. The input sensitivity however is 180mA as per the datasheet.
How do I get a list of the parts?
parts list
ACS712
1nF capacitor
100nF capacitor
100k Resister
I can see there are some others listed but do not know the specs.
Hi Jeff,
You should get most of the parts in your local electronics store, if not try it online. I have added the list of parts at the end of article. Hope it helps.
Hi, which model of opAmp could I use for this circuit? And what I have to do if I want have 3.3v out for Raspberry pi GPIO trigger. Thank you Frank very interesting.
How about Inrush current(input surge current or switch-on surge)?I built this circuit as an electronic fuse,But Inrush current make this fuse unusable,It disconnect repeatedly at start.How to solve This problem?
Ebrahim,
Honestly i haven’t taken that into consideration in this design. What do you mean it disconnect repeatedly at the start?
Thanks for your reply.
Suppose that I set RV1 to 2A,Devise switch-on surge current that consumes by filter caps and inductors,Draw for example 5 amp for 50 ms and fuse disconnects at first.while fuse disconnected,Consumer capacitors discharge again,and this cycle occurs frequently.
lately,I use this sensor with uc Attiny13 and this problem solved with check ADC again after a 100-300 ms and then if condition remains true set or reset output pin or variable,but actually
I think this is good idea that operate this current sensor with analog device Of course without mentioned problem.
What about placing a capacitor on pin 7 of ACS712? That way you can delay the trigger of the Comparator. The larger the capacitor value the longer the delay.