Electronic Locks are highly useful to protect our possession and it was widely used in all places. The demand for Electronic locks is high since it offer high security and easy to handle rather than the mechanical locks. Most of the E-locks in the market are cost more and not everyone could afford buying these locks. The circuit above can be a best solution for those who want to build an effective and low cost Electronic lock.
WORKING OF CIRCUIT:
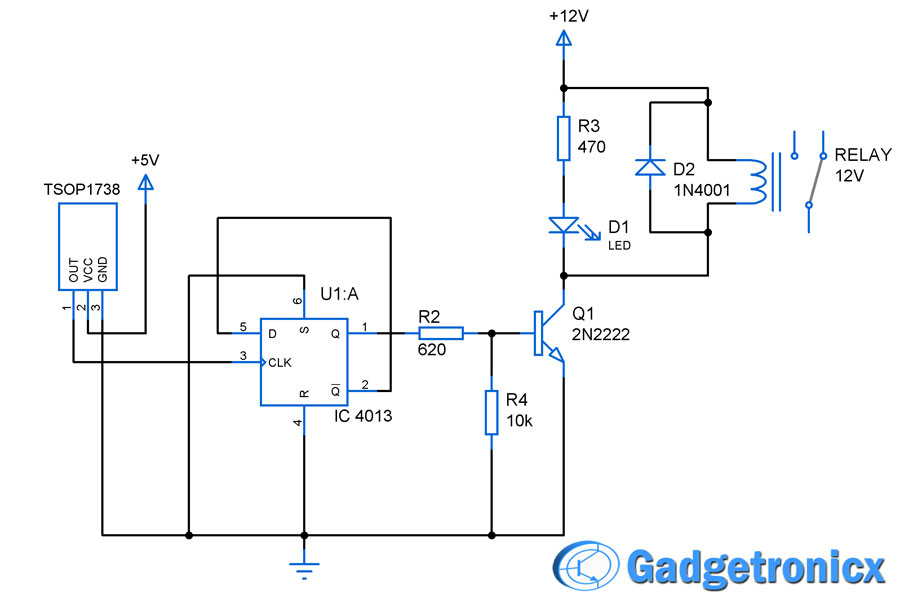
This code lock circuit was build around two D type Flip Flops IC’s CD4013. The operation of a single D type Flip flop unit is very important to understand the working principle of the above circuit. The operation of a D type Flip flop is as follows: Any input appearing at the data input D during present state will appear at pin Q during the next clock cycle. This operation principle forms backbone of the above code locker. The below truth table of IC CD4013 might give you the idea of its working.
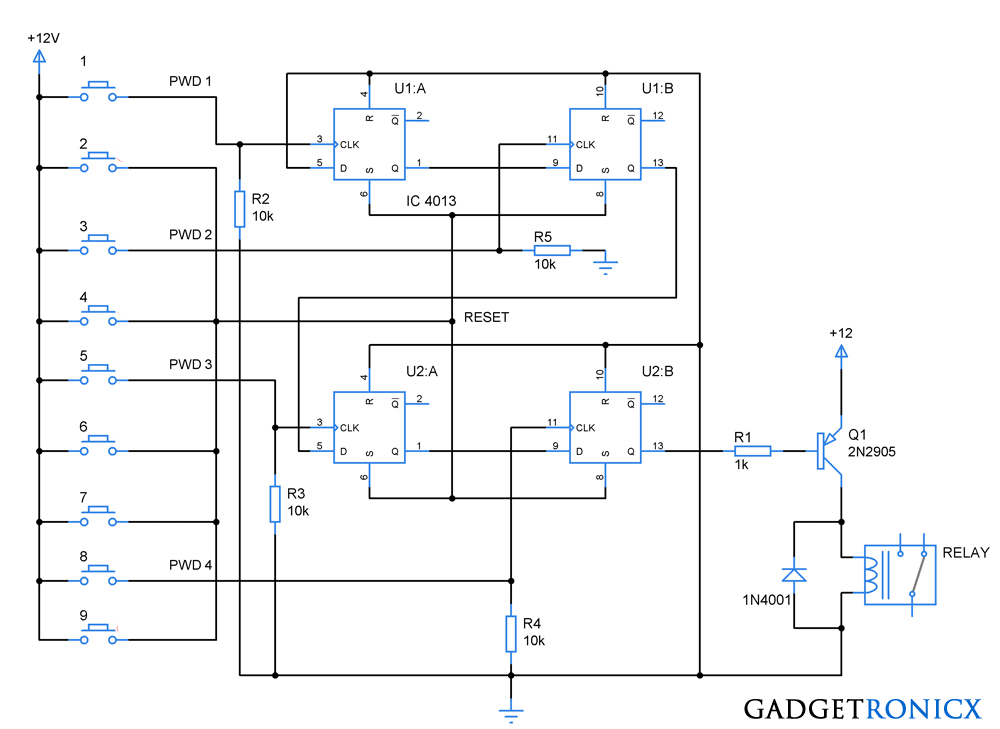
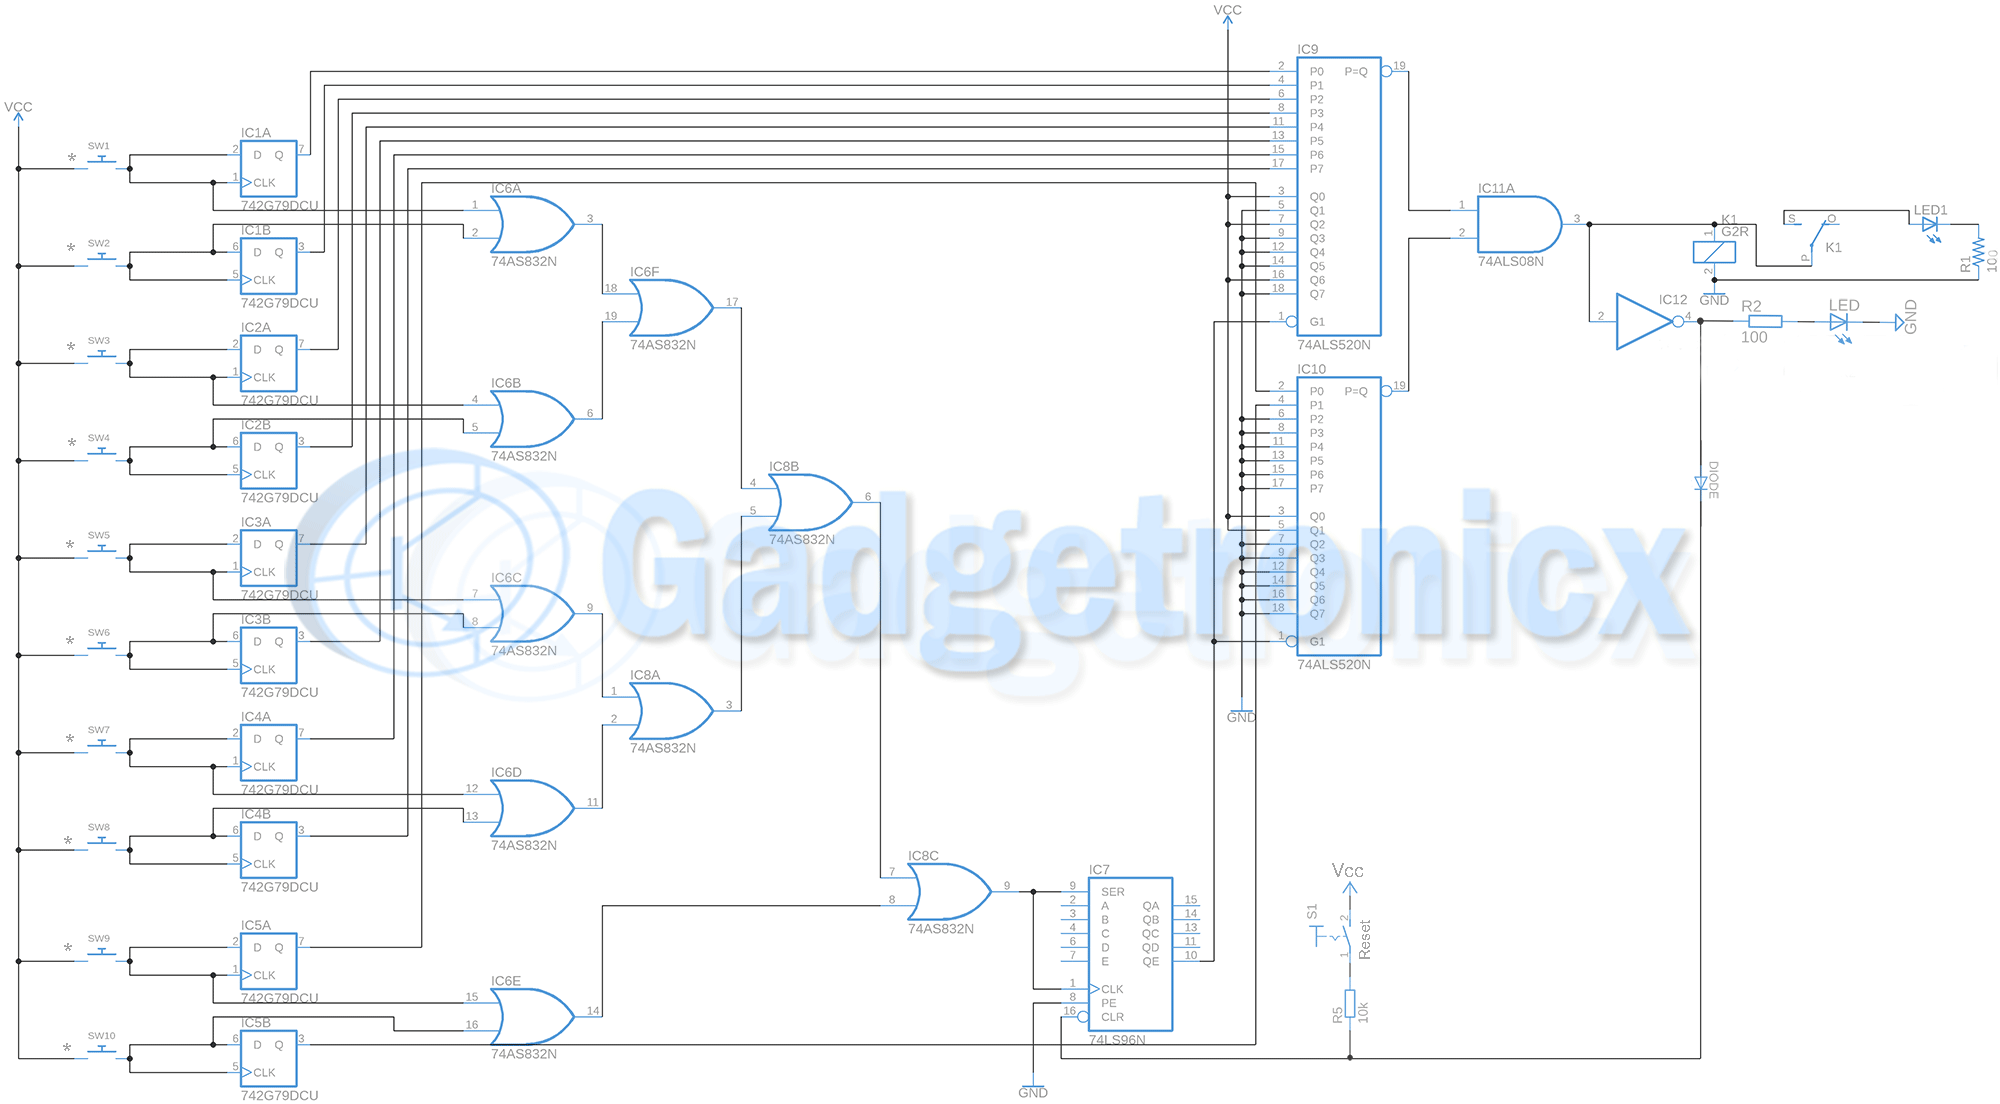
In the above circuit the Switches 1,3,5,8 are wired to feed the clock pulse to each flip flop units U1:A,U1:B,U2:A and U2:B. Therefore the password for the above locker is “1358” and should be pressed in the given sequence. Now take a look at the first state of the given table where it was stated that when positive edge clock was fed in to the CLK pin of the IC when Data pin D was in low 0 state will result in Low and high state in Q and Q’ pins of the IC. This state was used in the whole circuit.
Initially D pin of the U1:A is grounded and this in turn gives low output at pin 1 Q when positive edge is encountered in the CLK pin of U1:A by pressing switch 1. The Pin 1(Q) was wired to the Data pin 9 of U1:B, this will place the low signal in it. When switch 3 is pressed the positive edge clock is fed to U1:B, this will force the Q pin of U1:B to exhibit low state which was fed in its data input. This process will continue as you press 5 and 8 switches. Finally after switch 8 is pressed the Q pin 13 of U2:B will gives a low signal which in turn turns the PNP transistor ON and therefore the relay gets activated.
When anything other than the Password switches “1358” is pressed Q pin of the all the flips flops will obtain high 1 state as shown in the above table. Therefore the locker will remain in lock state. Pull down resistors R2,R3,R4 and R5 was used to ensure that the CLK pin was in low state before feeding the input pulse. A diode was added along with the relay to prevent the reverse flow of current which might damage the IC.
NOTE:
- You can change the password sequence by appropriate wiring to the CLK pins of each flip flop units.
- The VDD(power) and VSS(ground) pins of the IC was omitted for simplification of the schematic.
- Sometimes the IC 4013 may not start with high state on start up, in that case add a power on reset circuitry to the reset pins of flip flops.


OK, so where do I even start…
1) The electrical circuit DOES NOT WORK the way it should cause the reset function doesn’t have a constant low state so I had to connect a 10 KΩ resistor to the ground so that D trigger can properly reset.
2) I have so many problems with it I literally spent a WHOLE month working on it and when I had my work defense it didn’t work the way it has to cause not the relay was ON when it shouldn’t be and it turned off when I press the first 2 CLK signals and if I press the reset any of the reset buttons it turns off the relay but opens it right after I release the button.
so basically this circuit does work but it has a lot of things you should take in count when making it cause it can have problems when making it and if it does work then its only cause the D type triggers have some errors in
If I fail my class cause of this… I’ll make a working key code with safer use.
But still tanks for the key code I got to learn a lot about the D type triggers
have a nice day !
do you have a working circuit diagram? would love to see it
what is the model name of relay ?.
is it spdt relay ? parameter values ?
I intend to generalize the relay and depends upon your requirement. The activating transistor with the bias resistor value is capable of handling 150mA so if your relay fits within this rating you are good to use this circuit. If you want to use more current consuming relay I suggest you to change the Transistor used in the circuit above.
HOW CAN I BUY ALL THE COMPONENTS OF THIS CIRCUIT
The components used in this circuit is very common and you can purchase it in any local electronics store or try it via online