Voting systems are one of the finest examples of Embedded devices and applications. The complexity and robustness of a voting system depends on the number of voters involved. Here you could see a simple Arduino based voting system that would be a great fit for small-scale elections such as in schools or colleges. This system was designed to ensure security and the coolest thing is the whole voting process can be done with assembled hardware and Arduino IDE.
DESIGN:
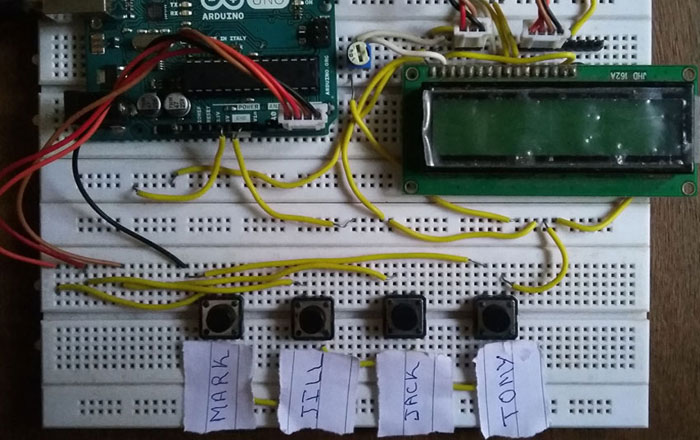
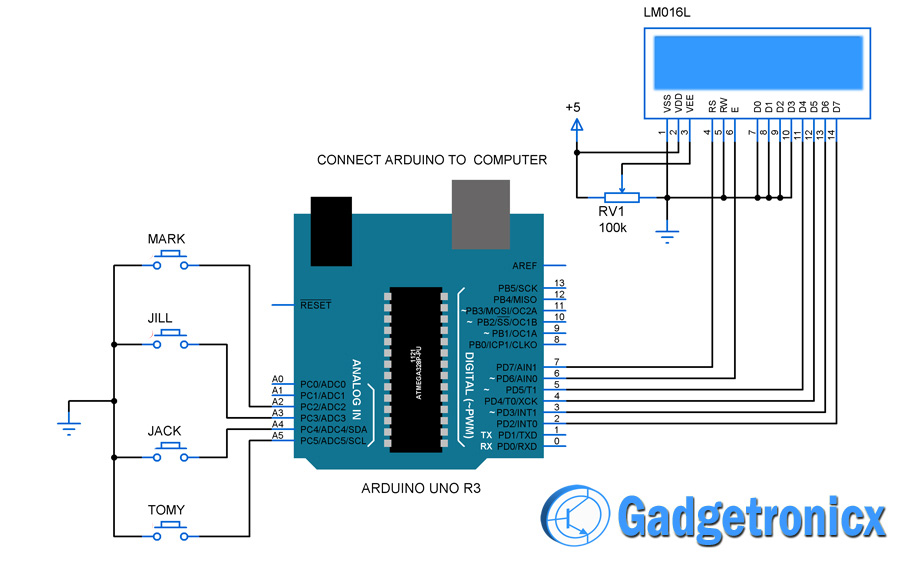
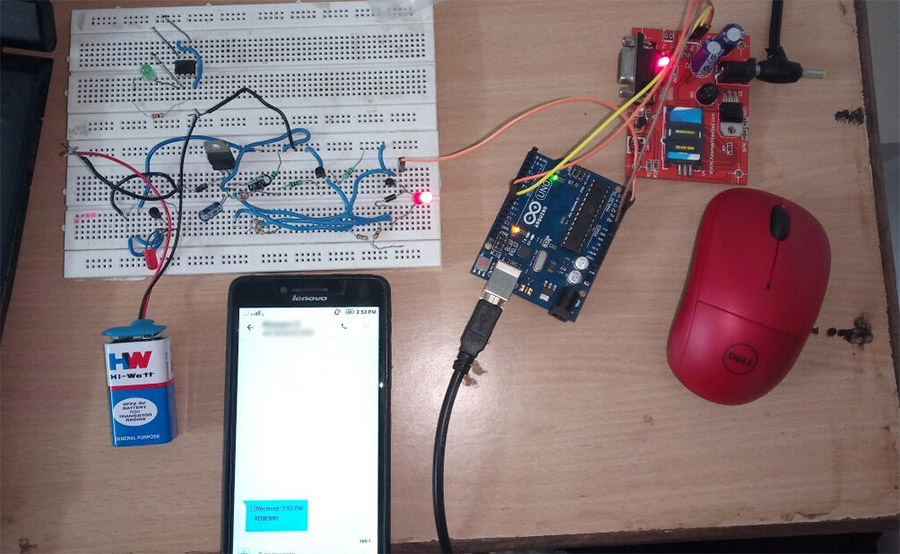
This voting system takes vote inputs from pins A2 to A5 of Arduino. A LCD used to show candidates name which was connected in 4 bit mode to the Arduino. Then connect the Arduino to the computer using the serial connection through the USB.
FEATURES:
SECURITY:
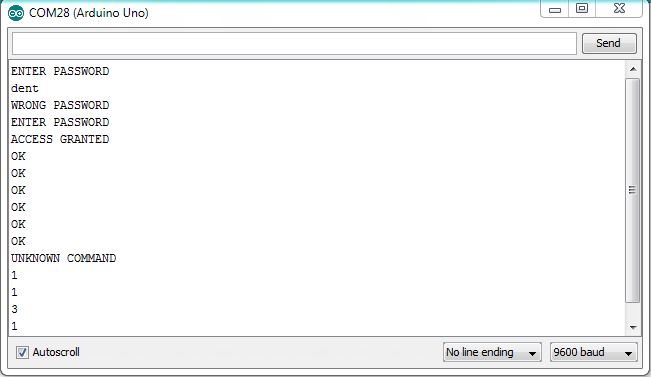
Security will be the biggest concern in any kind of embedded system. So the security of this system is reinforced by a password input method after initializing the system. The system will permit the poll organizer to operate only after entering the correct password.
POLL CONTROL:
The code was constructed in such a way the arduino requires single character commands to allow voter to cast the vote. I have programmed arduino to let the voter cast the vote on input of character “V” in the serial monitor screen. And this command allows only a single vote to be casted in a single instant. This prevents voter to cast multiple fake votes.
DISPLAYING RESULTS:
Poll results can be displayed by entering character command “D” in the serial monitor. Entering “D” will make arduino to send the poll tally to the serial monitor in sequential order which we have programmed. This will help us to get the results instantaneously.
ALGORITHM TO CODE:
- Initialize the serial connection in your Arduino.
- Wait for password input and check the input password match with default one once it is entered.
- If input password is correct grant access for the user to give the command input.
- If “V” is pressed start scanning the keypad to detect the vote input.
- Allow only one single input by the voter and again wait for further command.
- If “D” is pressed send the poll tally to the serial monitor from Arduino.
STEPS TO CONDUCT POLL:
- Open the Arduino IDE and then the serial monitor.
- Enter the correct password.
- Press “V” to allow voter to cast their vote.
- Press “D” to display poll results.
- After every single vote you need to press “V” to allow the next voter to cast their vote.
SNAP OF VOTING WINDOW:
BUY ARDUINO CLONE FROM AMAZON:
WORKING VIDEO:
CODE:
#include <LiquidCrystal.h>
int votes[4]={0,0,0,0};
char inbyte;
LiquidCrystal lcd(7, 6, 5, 4, 3, 2);         //LCD connections
  String pwd="VOTE";                         //Default Password
  String inpt="";
  boolean flag=false;
  boolean securitygranted=false;
  int i;

void setup() {
  pinMode(A2, INPUT_PULLUP);              //Setting pins as input
  pinMode(A3, INPUT_PULLUP);
  pinMode(A4, INPUT_PULLUP);
  pinMode(A5, INPUT_PULLUP);
  lcd.begin(16, 2);
  lcd.display();
  Serial.begin(9600);                    //Begin serial communication
  Serial.println("ENTER PASSWORD");
}

void loop() {
  while(flag==true)                     //Check flag for "V" command
  {
  if(digitalRead(A2) == LOW)
  {
  flag=false;
  lcd.print("MARK");                  //Example candidate name
  votes[0]=votes[0]+1;
  }
  else if(digitalRead(A3) == LOW)
  {
  flag=false;
  lcd.print("JILL");
  votes[1]=votes[1]+1;
  }
  else if(digitalRead(A4) == LOW)
  {
  flag=false;
  lcd.print("JACK");
  votes[2]=votes[2]+1;
  }
  else if(digitalRead(A5) == LOW)
  {
  flag=false;
  lcd.print("TOMY");
  votes[3]=votes[3]+1;
  }
  }
}

void serialEvent()
{
  while(Serial.available())
  {
   inbyte=(char)Serial.read();                   //Reading incoming character
   if(securitygranted==false)
   {
    inpt += inbyte;
    inbyte='\n';
   }
  }
  commandcheck();
}

void commandcheck()
{
  switch (securitygranted)                    //See for the security permissions
  {
    case false: {
      if(inpt==pwd)                          //Checking for password match
        {
          securitygranted=true;
          inbyte='\n';
          inpt="";
          Serial.println("ACCESS GRANTED");
        }
       else if((inpt!=pwd)&&(inpt.length()>3))        //Mismatch
       {
          Serial.println(inpt);
          inpt="";
          inbyte='\n';
          Serial.println("WRONG PASSWORD");
          Serial.println("ENTER PASSWORD");
          Serial.end();
          delay(100);
          Serial.begin(9600);
       }
       break;
              }

   case true: {
      if(inbyte=='V')
        {
          flag=true;                             //Allowing voter to cast a single vote
          Serial.println("OK");
          lcd.clear();
          inbyte='\n';
        }
      else if(inbyte=='D')
        {
          for(i=0;i<=3;i++)                       //Displaying vote tally
          Serial.println(votes[i]);
          inbyte='\n';
        }
      else
        {Serial.println("UNKNOWN COMMAND");}
        break;
             }
  }
}
Sorry the code is pretty big since am a beginner with Arduino but i do assure you it works perfectly.
NOTE:
- You can increase the number of candidates with the unused pins.
- Make sure you finishing the voting process in a single shot because the Arduino will reset every time serial monitor is being opened.
- You can try Writing vote data in internal EEPROM for permanent storage.



Pingback: Arduino Voting Machine • Tech Projects
what if i want to set id and pass for each voter using key pad ,what will be the code then?
Please send the hardware connection video
Refer circuit diagram